Invite Your Team
Collaborate with your security team by adding users to your CastellanAI account.
Why Invite Team Members?
Security monitoring is a team effort. Inviting colleagues allows you to distribute responsibilities, enable 24/7 coverage, and leverage specialized expertise across your security operations.
| Benefit | Description |
|---|---|
| Shared Visibility | Everyone sees the same security events and threat intelligence in real-time |
| Role-Based Access | Assign appropriate permissions based on each team member's responsibilities |
| Faster Response | Distribute alert notifications to reduce response time and improve coverage |
How to Invite Team Members
Step 1: Navigate to Team Management
From the Customer Portal header, click Team to access team management.
- Log in to your Customer Portal at castellanai.com
- Click Team in the header navigation
- Click the Invite Team Member button in the top right
The Team page shows a summary of your current team members, pending invitations, and admin count at the top.
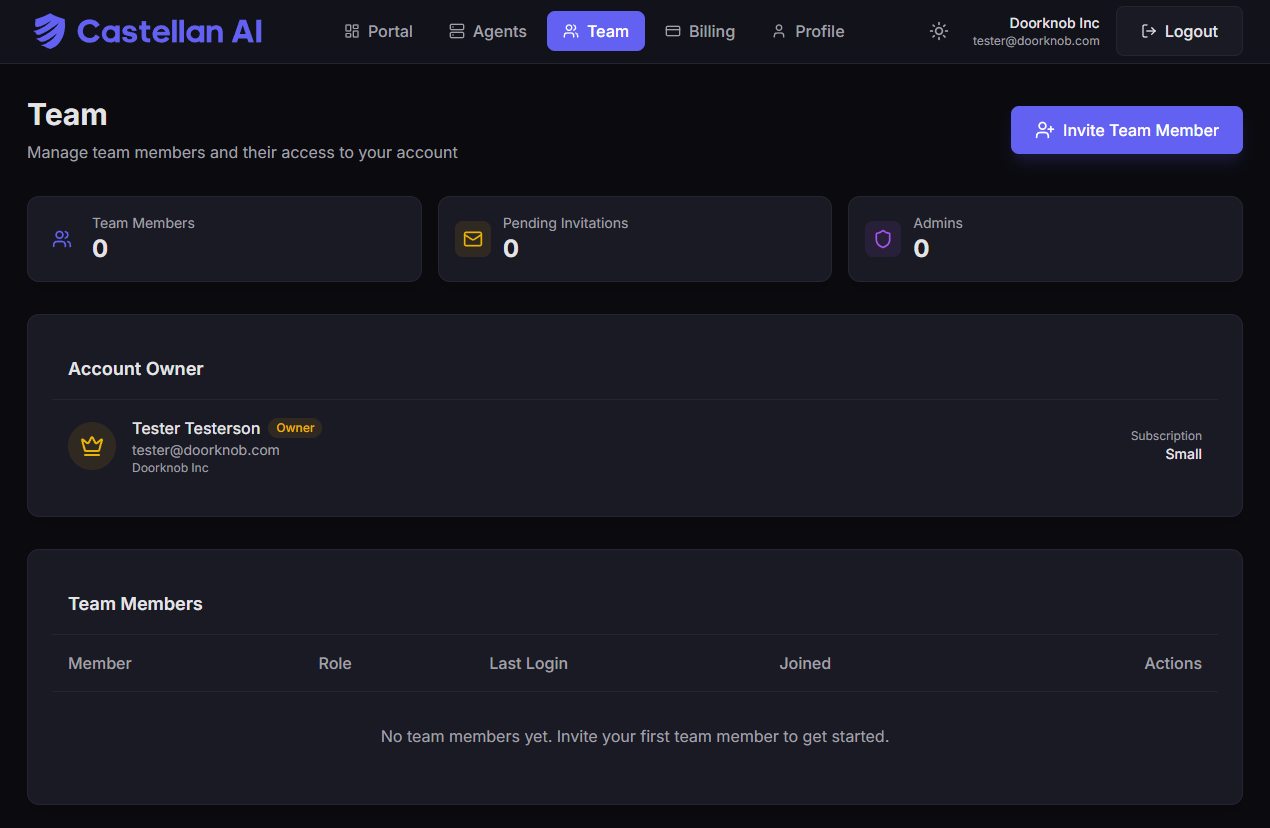 The Team page showing team members, pending invitations, and the "Invite Team Member" button.
Step 2: Enter User Details
The invitation form requires the following information:
| Field | Required | Description |
|---|---|---|
| Email Address | ✅ Yes | User's email address for login and invitation delivery |
| Full Name | ✅ Yes | First and last name for identification in the portal |
| Role | ✅ Yes | Choose from: Admin, Member, or Viewer |
| Welcome Message | Optional | Personal message included in the invitation email |
Step 3: Select Role & Permissions
Assign the appropriate role based on the user's responsibilities:
- 👑 Admin
- 👤 Member
- 👁️ Viewer
Admin Role
Full account access including billing, team management, and all features.
Best for: Security managers, team leads, co-administrators
| Permission | Access |
|---|---|
| View/Manage Agents | ✅ Full |
| Security Dashboard | ✅ Full |
| Billing & Subscription | ✅ Full |
| Team Management | ✅ Full |
| Account Settings | ✅ Full |
Admins have complete control over the account. Assign this role carefully.
Member Role
Can manage agents and view billing, but cannot manage team members.
Best for: Security analysts, IT administrators, operations staff
| Permission | Access |
|---|---|
| View/Manage Agents | ✅ Full |
| Security Dashboard | ✅ Full |
| Billing & Subscription | 👁️ Read-only |
| Team Management | ❌ None |
| Account Settings | ⚙️ Own profile only |
Viewer Role
Read-only access to the dashboard and agent information.
Best for: Executives, auditors, compliance officers, stakeholders
| Permission | Access |
|---|---|
| View/Manage Agents | 👁️ View only |
| Security Dashboard | 👁️ View only |
| Billing & Subscription | ❌ None |
| Team Management | ❌ None |
| Account Settings | ⚙️ Own profile only |
Viewers cannot make any changes to the system. This is ideal for stakeholders who need visibility without risk of accidental modifications.
View detailed role permissions comparison →
Step 4: Send Invitation
- Review all entered information for accuracy
- Click Send Invitation
- User receives an email with a secure link to accept the invitation
- Invitation appears in the "Pending Invitations" section until accepted
What Happens After Invitation
| Stage | Description |
|---|---|
| 1. Email Sent | The invited user receives an email with a secure acceptance link |
| 2. Pending Status | The invitation shows in your Team page under "Pending Invitations" |
| 3. User Accepts | When they click the link, they create their password and activate their account |
| 4. Access Granted | The user can immediately log in with their assigned permissions |
Managing Invitations & Team Members
Pending Invitations
For any pending invitation, you can:
| Action | Description |
|---|---|
| Resend Invitation | If the user didn't receive the email or it expired |
| Cancel Invitation | Revoke the invitation before it's accepted |
Click the three-dot menu (⋮) next to any pending invitation to access these options.
Active Team Members
For existing team members, you can:
| Action | Description |
|---|---|
| Change Role | Adjust their permissions level |
| Remove Member | Revoke their access entirely |
Click the three-dot menu (⋮) next to any team member to access these options.
Removing a team member immediately revokes their access. This action cannot be undone.
Account Owner
The account owner (the person who created the account) is displayed separately at the top of the Team page with a crown icon.
| Property | Description |
|---|---|
| Full Admin Access | Has complete control over all features |
| Cannot Be Removed | The owner cannot be removed from the account |
| Cannot Change Role | The owner's role cannot be modified |
| Billing Responsibility | Responsible for billing and subscription management |
Team Management Best Practices
🎯 Start with Key Personnel
Invite primary security team members first before expanding to other stakeholders. This ensures your core team is operational before adding viewers and peripheral users.
🔒 Follow Least Privilege
Assign the minimum permissions needed for each role:
- If they only need to view, make them a Viewer
- If they need to manage agents, make them a Member
- Only grant Admin to those who need full control
✉️ Provide Context
Use the welcome message to explain:
- Why they're being invited
- What they'll be responsible for
- Who to contact with questions
🔄 Review Regularly
Periodically review team access:
- Remove inactive accounts
- Downgrade unnecessary permissions
- Verify role appropriateness after job changes
👥 Maintain Multiple Admins
Ensure at least two people have admin access for continuity:
- Prevents lockouts if one admin is unavailable
- Enables approval workflows
- Provides backup for critical operations
What's Next?
| Guide | Description |
|---|---|
| Roles & Permissions | Detailed breakdown of what each role can do |
| Multi-Factor Authentication | Set up MFA for enhanced account security |
| User Activity | Monitor team member actions |
Need Help?
Having trouble with team invitations? Check our troubleshooting guide or contact support.
Contact Support for assistance with team management.